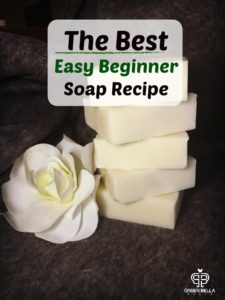
Homemade soap is all the rage these days! From big farm homesteaders to city dwellers, so many people are finding out that making your own soap is not only easy to do but so much fun! Making your own soap will also help you lead a more natural lifestyle. Regular commercial soaps are full of chemicals and artificial dyes. By making your own soap, you are in control of the ingredients! It is always best to start off with an easy recipe so I have put together my favorite easy recipe for you to dive into your first soap making experience!
(This post may contain affiliate links for your convenience.)
Ingredients:
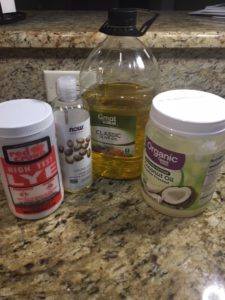
Essential Oil/Fragrance Oil of choice- 1 oz (Optional) You can find my favorite Lavender Essential Oil here
Supplies:
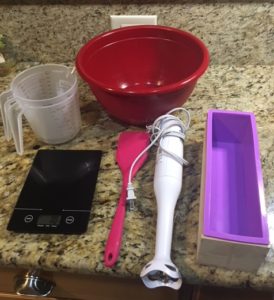
1 Large Bowl
2 Small Bowls or Plastic Measuring Cups
Mixing spoon
Mold (this is my favorite mold!)
Gloves
Safety Glasses
Let’s Talk Safety
Soaping is a chemistry experiment. Only through lye (Sodium Hydroxide) can you reach saponification. Saponification is the chemical reaction that happens when you mix fat (oils) with a lye based solution. Without saponification, you can’t have soap. Most of the people I talk to, who want to try soaping, are afraid of lye. They have heard horror story’s about chemical burns and it makes them leery of trying. Well, I am hear to say that as long as you have the proper safety equipment, there is nothing to be afraid of! Lye can be very irritating to the skin so that is why you should always wear gloves when you are making soap. Also, you should always use safety glasses just in case some of the lye splashes. Lye can be dangerous if you do not follow these simple rules! Once the soap is fully cured there is no lye left in the soap so you do not have to worry at all about it touching your skin.
Let’s Make Soap!
Once you have your gloves and safety glasses on, use the small bowls or plastic measuring cups to weigh out the lye and water. Make sure your bowls can handle high heat as the lye mixture will get very hot. Also you should always mix your lye solution outside or in a well ventilated area. Pour the lye into the water slowly and mix until fully dissolved. Let the lye water sit until it cools down until it reaches between 90°F- 110°F. If you soap at higher temperatures, your batter may thicken up too quickly making it difficult to pour into your mold.

While your lye solution is cooling, you can weigh your oils. Make sure you weigh out each oil as precisely as possible. It is important that your coconut oil is in liquid form. I always heat it up for 30 seconds or so after I weigh it that way it mixes well with the olive and castor oils. After your coconut oil is completely liquefied, pour all of your oils into a large mixing bowl.
Once your lye solution has cooled, slowly pour it into the oil mixture. You will see the oils immediately start to change to an opaque consistency.
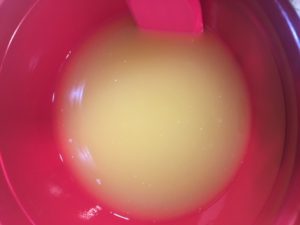
Now you must mix the raw soap until you reach trace. Trace is when the soap begins to thicken.
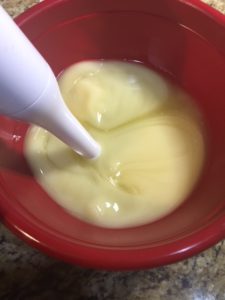
Everyone has their idea on what the perfect trace looks like but basically when it is thick enough to stay on the spoon or you can draw a line with the spoon on the bottom of the bowl you know you are at trace. You could continue mixing this solution with your mixing spoon until you reach trace, but this would take a long time. If you have an immersion blender, it will cut your mixing time way down.
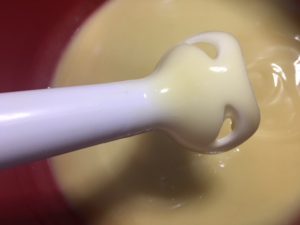
Use the immersion blender until your soap batter comes to trace. Once it is at trace, if you are going to add any fragrance or essential oils, this is the time to do it. Once your essential oils are in the bowl, give the batter another quick 5-second mix with the immersion blender.
Now you are ready to pour your batter into the mold! Make sure to pour the batter slowly that way it doesn’t splash.
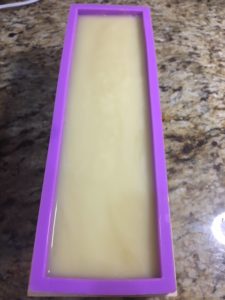
And Now We Wait…
Once all of the batter is in the mold cover the mold and set indoors in a dry place for 24 hours. If your mold did not come with a cover, you can use cut-out pieces of cardboard and towels to insulate the mold.
Once your soap has hardened it is time to cut! You can use a knife or a Soap Cutter to do this. After they are cut and you have appropriately marveled at their beauty, put them in a cool dry place to cure for 4-6 weeks. I know, I know…4-6 weeks seems like forever! Unfortunately that is the amount of time it will take for the water to evaporate in the soap. I promise that 4-6 weeks will be here soon enough and you will be able to enjoy your first soap!
And that’s it! You have made your soap! Congrats! But I must warn you, soap-making can be addictive!
Did you try this recipe? If so, comment below on how it turned out!
Until Next Time!
Eva
[convertkit form=5179668]

Oh I’m saving this! I’ve always wanted to try making soap, but like you mentioned, I’m nervous about working with lye! When I’m ready to give it a try I’m coming here!
Yay! Awesome! Let me know how it turns out!
Eva,
I must confess i am one of those worriers you spoke of. I’m not gonna lie lye scares me. I trust that with proper safety precautions I will be able to overcome my fear. I am anxious to give this a try. Currently I do not have all the supplies necessary to give this a whirl. I’m curious have you priced it out and can you give a ball park as to about how much it costs to make that batch in the recipe and (I know depending on the mold one chooses) but about how mny bars that batch makes?
Hi Mary! I am glad you are interested in making your own soap! The cost of making soap really depends on the quality of ingredients. You can get non-organic oils and it would lower the price down significantly. For this batch the mold I used was about $13 and you will need to have some bowls and an immersion blender. You can find all of the items needed and their price in the post if you click on the highlighted links under the Supplies and Ingredients list. The great thing is that while initially you will need to purchase some supplies, one you have them you do not have to buy them again and you can focus on just having to buy the oils. Hope that helps!
I have always wanted to make my own soap but couldn’t ever find step to step instructions. Some people don’t like to tell their soap making secrets! Thanks for sharing this!
You’re welcome! 🙂
Love this! I have been wanting to make my own soaps for so long but have been so intimidated by the idea. Your post makes it seem so simple and much less scary, lol. I’m going to have to give it a try 🙂
Thank you! Definitely give it a try! It is a lot of fun. 🙂
I’ve looked into DIY soap but always seemed complicated. Your post explained the process & I feel confident that about trying it out! I work in the wedding industry and homemade soaps always looked like they would make such an amazing gift or favor. Definitely will be trying out your tutorial! I know this is a beginners soap recipe so I’m not sure how much customizing is allowed but…I have some dried rose petals I’ve been saving for a project. Do you think it is possible to add petals to bottom of the mold with this recipe? Thanks again!
Hi Miya! Thank you! I have had several clients that use my soaps for wedding favors. Unfortunately most petals will brown and stain the soap during the saponification/curing process. The only flower that I have been successful with are Jasmine flowers. Your best bet is to do a simple melt and pour. With the melt and pour the saponification has already occurred so you won’t have to worry about the petals browning and staining your soap. You will not be able to control the ingredients in a melt and pour as you would in this recipe but if you really want to use petals, that is your best bet! Let me know how it turns out! 🙂
You recipe for soap made it look so easy. Thanks for breaking the recipe down so a first time soap maker could follow.
I have been looking into making our own soap for a while now! I’m going to save this post for when I actually try. I’m nervous about the lye, but your post has calmed those fears! Thanks!
I have always wanted to make my own soap. I love the step by step instructions and pictures! I also like the safety part. Never making soap before I would not know about this. I’m saving this so I can try and make the soap. Thanks for sharing.
I’ve been meaning to add more DIY clean, healthy items to my real food lifestyle and your article makes it seem so simple that I can’t wait to get started. Thanks for including simple and clear steps to remove the complication and confusion. I may even be so bold to hand these out as Christmas party favors. Thanks!
I love making my own soaps and instructions were very clear.
I love making soap, but I’ve only ever done melt-and-pour soaps which are obviously a lot easier! But I love how simple you made these instructions. Thank you for sharing!
Surprisingly, I have never tried making my own soap. I am a DIYer when it comes to so many things, but not soap so far. I love how informative this is. Also, the instructions look so easy! I will be saving this to try my first batch of soap.
Have to admit I’ve always wanted to make my own soap with essential oils, but like so many others, the lye scares me. Is there a particular glove or safety glasses that you prefer?
Thanks for breaking this down for me & easing my worries over the whole lye issue. I am definitely in that category of scairdy cat :). I have been wanting to give making soap a try and now have definitely put this on my list!
I’ve always been curious about making soaps and other personal products. I will definitely be trying this later!